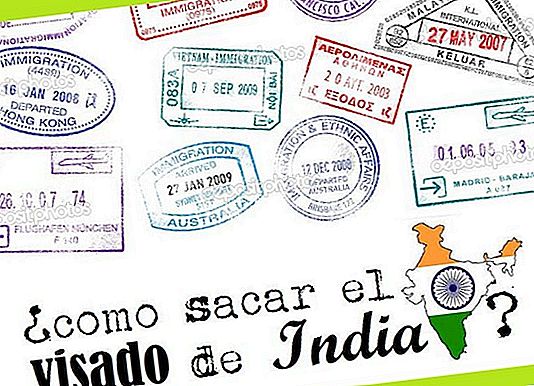
Congratulations! If you have finished in this article it is very likely that you are preparing a trip to India ... Good destination! So they don't hold you back at the airport and send you back to your house you need a visa (you've got it right). But How to get it out? How much does it cost? How long is it? What requirements do i need? For all your doubts about how to get the visa from India keep reading…
Before, it was only possible to obtain a visa in person at one of the Indian embassies or consulates around the world, or through a specialized agency. For our first trip to India we had to do all the paperwork in Madrid, but fortunately you can already apply for a visa to India online (evisa)! Yeah So we are going to tell you the steps to request the visa from the official website of the government of India, and the characteristics of the so-called e-Tourist Visa.
There are several types of visa, the ones that interest us are tourism visas (there are other business, for medical staff ...). These are the types of visas for India that we can apply for:
- 30-day e-Tourist Visa (with two entries). Price of $ 25
- 1-year e-Tourist Visa (with multiple entry). Price of $ 40
- 5-year e-Tourist Visa (with multiple entry). Price of $ 80
Here you can see all the prices, depending on your nationality and type of visa.
This is the process that you have to perform in order to apply for an Indian visa online:
1. Enter the official website
First of all, go to the official website of the government of India for the visa application. Keep in mind that the website is in English, but if you follow our steps, there is no need to have any doubt. In addition you can always use the translator offered by the browser. This is the web:
→ //indianvisaonline.gov.in/visa/tvoa.html
2. Fill in the form with personal data
You will have to hit the “APPLY HERE FOR E-VISA” button, bottom right, and you will have to fill in 8 screens with your data:
* Only sections with an asterisk in red are necessary
SCREEN 1
- Passport type: Ordinary
- Nationality / Region: Spain
- Port of arrival: entrance airport (Delhi)
- Date of Birth: date of birth
- Email ID / Re-enter Email ID: Well, that, e-mail to send you the confirmation
- Expected Date of Arrival: expected date of entry to India
- Visa Service: type of visa to request. In case of a short stay: eTourist Visa (for 30 Days). And we select the activities that we plan to carry out in India. If the trip is only for tourism, we leave “RECREATION / SIGHT-SEEING” selected
- Please enter above text: write the text that appears in the box just above
- Select “I have read the instruction…” and click on CONTINUE
DISPLAY 2
Before entering let us know that we have to upload a photo card of dimensions 2in X 2in (2 inches equivalent to about 5cm) and with a size smaller than 1MB. And the copy of the passport sheet where personal information appears (must be uploaded in PDF format and smaller than 1MB). In the meantime an email will have arrived notifying you that a copy of your application has been saved, with an X.
- Applicant Details: Your personal information. The most doubtful thing is that here you will have to put your identity card number of your country (not the passport number), if you do not have visible marks put NO and say that you have NOT lived in the country where you are applying for the visa.
- Passport Details: passport details.
- Once with all the data ready we give “SAVE AND CONTINUE”.
SCREEN 3
Divided into three sections and in which we have to expand personal information:
- Applicant's Address Details: address where you reside
- Family details: information about your father and mother and marital status. At the end of this section you are asked if your parents or grandparents were Pakistani, so we left NO (no, right?).
- Profession / Occupation Details of Applicant: details of your current job. In order not to go into details, I put "worker". In the end they ask if you are or were a military or police officer: NO.
- Again, with all the sections completed, we give “SAVE AND CONTINUE”.
DISPLAY 4
In this section we will have to put the data of the trip to India.
- Details of Visa Sought: It is a summary of the visa requested, with the sites you plan to visit, if you have booked a hotel through a tour operator and the place from where you will leave India.
- Previous Visa / Currently valid Visa Details: if you have visited India in before you will have to put the data of the previous visa, etc. We did it but with another passport numbering, so we put NO. And also ask if they have previously refused entry or extension of stay in India: NO
- Other Information: countries visited in the last 10 years (uffff, a little above ...),
- SAARC Country Visit Details: If you were in any of the countries that make up the SAARC,
- Reference: the details of the hotel where you are going to stay. If you don't have one yet, you can look for one that is a candidate and put it. And then someone's contact in your country, in case you need to contact him.
- Again we give "SAVE AND CONTINUE".
SCREEN 5
These are security questions, which are usually answered NO. If in some you put YES, you will have to give more details. We select that we accept the statement below, and "SAVE AND CONTINUE".
DISPLAY 6 AND 7
It's time to upload your passport photo and passport copy:
Photo of the card: You have to meet these requirements:
- JPEG format
- Minimum size 10 KB and Maximum 1 MB
- The height and width of the photo must be the same. They suggest 2in X 2in (2 inches equals about 5cm, in digital photo about 600px).
- The photo must present a full face, front view, eyes open and without glasses.
- Center the head inside the frame and present the entire head from the top of the hair to the bottom of the chin.
- The background must be light or white.
- No shadows on the face or background.
- And we click on “Upload photo” and adjust it.
Passport copy: with these characteristics:
- Only the page where personal information and photo appear
- Pdf format
- Minimum size 10 KB and Maximum 300 KB
- And we give “Upload document”
We confirm that all the data corresponds to us by marking the last tab and we click on “CONFIRM”.
FINAL SCREEN
We will see the summary of our application form to obtain the India visa online. We check it and if everything is correct we click on “VERIFIED AND CONTINUE”. In case you want to change something, you just have to click on “modify”
3. Pay
When you verify the request you will arrive at the pre-payment gateway. First of all, they inform you that the price of this application is $ 25 (US dollars), which is then increased a little by a commission, and on this page they will notify you that if there is any problem in the payment, they are not made responsible. Write down the identification number of your application (ID) and click on “PAY NOW”.
Then he will give us 3 payment gateway options: Sbi e-pay, Paypal and Axis Bank. Discarding Paypal, I chose Axis Bank because apparently it is more likely to work for those who apply for a visa from Europe. Apparently Sbi e-pay It is recommended for those who do it from America.
You put the card information and proceed to the payment. If everything goes correctly you will get a page telling you that the payment has been made correctly and you can download a receipt. You will also receive an e-mail with confirmation of payment and receipt of the request. From now on we must wait for a period of 72 hours until they send us the approval of our dearest visa to India.
IMPORTANT: the update of the payment status in the part of payment status of the web can take up to 2 hours. If you have had any problem in the payment and you are not sure that it has been made, it is recommended to wait those 2 hours before paying again.
4. To consider
- The electronic visa payment fee once the application is submitted is non-refundable, regardless of whether it is approved or not.
- Confirm that the status of the ETA appears as “GRANTED” in the email sent to you or in the profile with the request status from the website itself.
- It is recommended to bring a copy of the Electronic Travel Authorization (ETA) on the trip.
- Duration: 30 days from the entrance to the country
- Tickets: double, so you can leave the country and re-enter once.
- Possibility of extension: no
- Process between 120 days and 4 days before the trip.
- Price: 25$ Plus a commission.
- Requirements: passport valid for at least 6 months, scan a photo and passport and pay.
We hope this information on how to get the visa from India help you!


